#1 DIY footed cake plates
#1 DIY footed cake plates
Serve your holiday dessert in style

Before anything else, just a heads up to readers who subscribed to blog updates using the Grow.me service currently installed in Umami Days. The “send update” component of the service doesn’t seem to work (I tested it by publishing a new post and watching my inbox for a notification that never arrived) so I have moved your subscriptions to Substack. This is the service that I will use exclusively to send newsletters. If you’d rather have your email removed from the list, you may use the “unsubscribe” link at the bottom of this email. I hope you won’t though because this newsletter is going to be so much more than about recipe updates.
Now, about footed cake plates. I’ve never owned one. For starters, they’re a pain to store. So much space taken by a single contraption that isn’t even used on a daily basis. Plus, I’ve never really found a footed cake plate that I like and afford at the same time. Most look like they’re from my grandmother’s cupboard, and that’s not exactly my style. The ones I do like come with price tags that make me flinch.
So, how do we serve cakes and pastries at home? Honestly?

Store bought cakes are removed from the box, we cut and serve the slices on regular cake plates (which are traditionally around six to eight inches in diameter), put the remaining cake back in the box and stick the box in the fridge.
Home baked cakes are served on regular plates. Depending on the size of the cake, the plate it is served on can be anywhere from eight to twelve inches. The unfinished portion of the cake goes into a container (think Lock & Lock) which goes into the fridge.
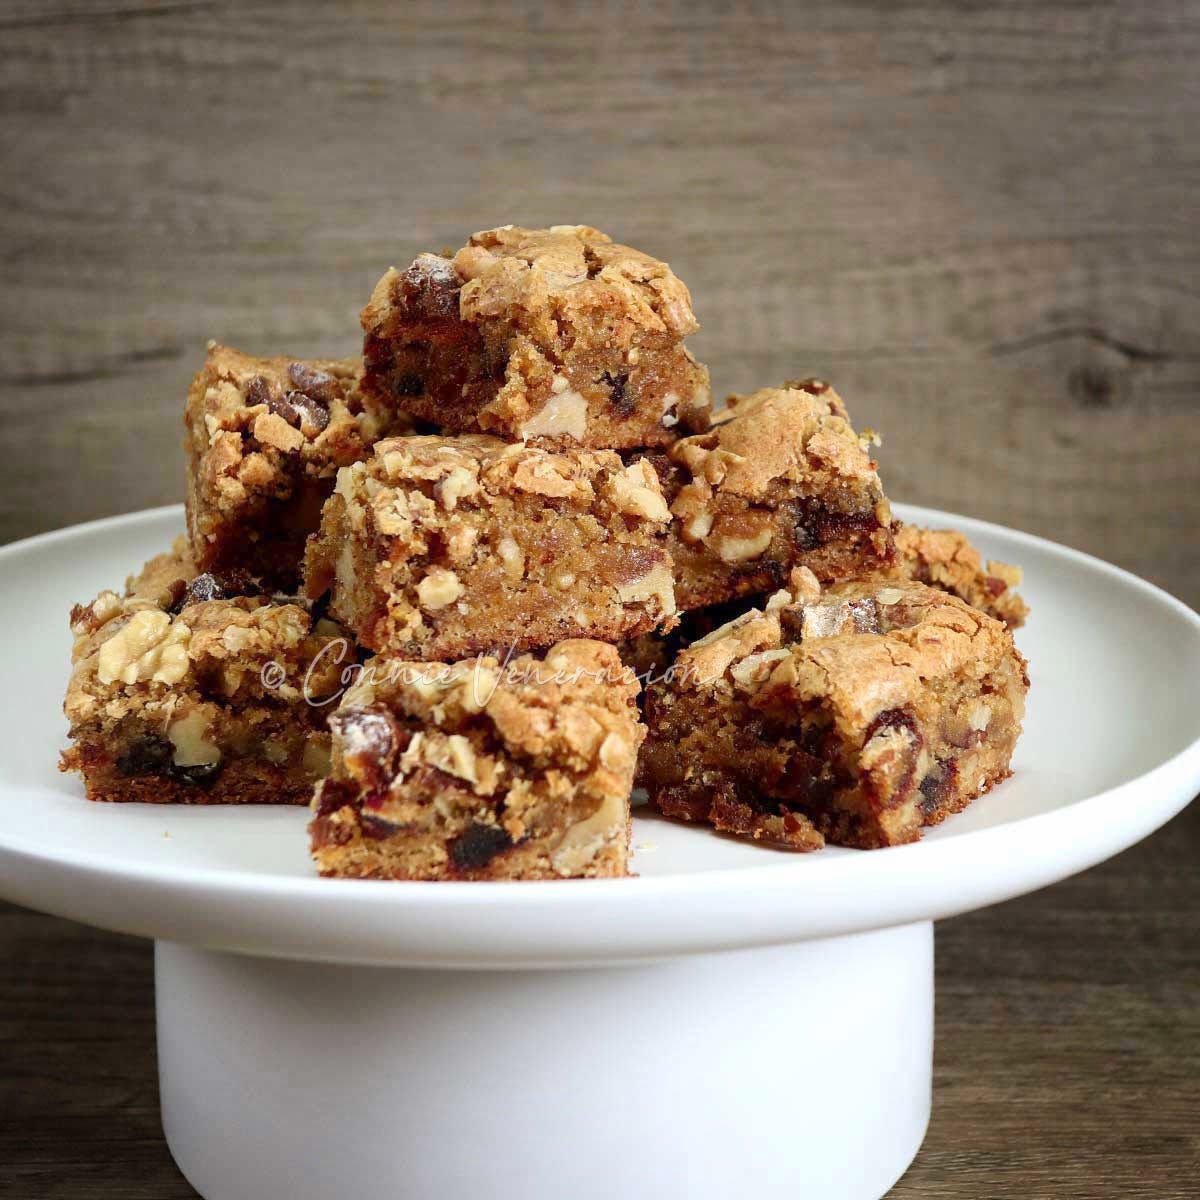
But, when entertaining, on special occasions, when I have to shoot photos for a cake / dessert recipe or if I’m feeling whimsical and I just want to make a striking visual presentation on the dining table, I assemble my own footed cake plate.
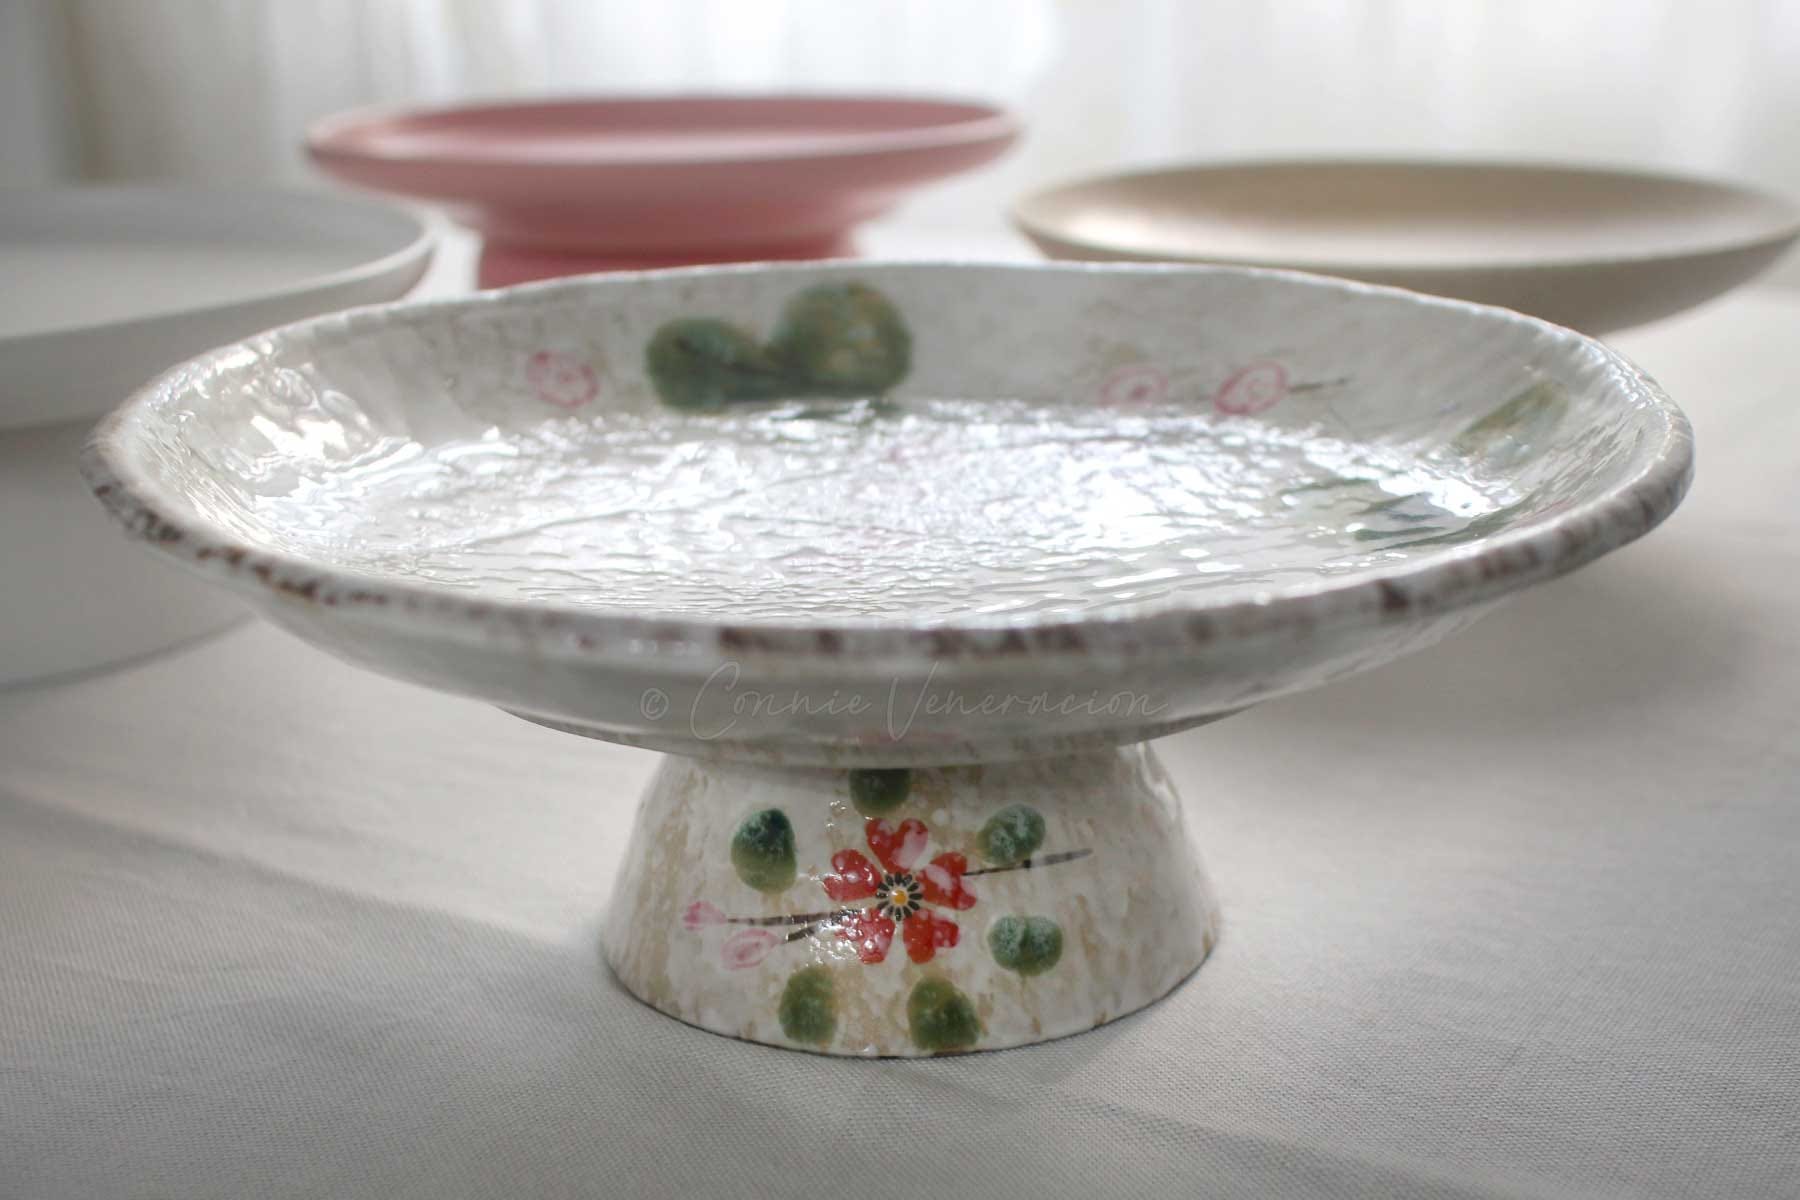
Assemble? Yes, assemble. It’s easy. Just choose a plate and a bowl that look well together, position the bowl upside down on the table, place the plate on top, and it’s a footed cake plate. The inverted bowl serves as the foot (a pedestal, if you will), and the plate is where the cake goes. And I have as many footed cake plates as I want, in colors and designs that I prefer, without the storage problem.

But is it sturdy? That’s an issue, right? When you have your family reunion over the holidays, there will likely be children moving around excitedly, the tablecloth can get pulled accidentally and a DIY cake plate is likely to topple over.
I have a fix. It’s called double-sided tape which you can get from the grocery or hardware store. You just need a small piece. One-inch square should do it.
Find the center of the bottom of the bowl and plate, and mark with a water-based pen. Peel off the paper that covers the adhesive on both sides of the tape. Stick the tape on the bottom of the inverted bowl or on the bottom of the plate (it works either way) then stick the bowl and plate together making sure that the centers you had marked are aligned. Your DIY footed cake bowl is now secure.
When the cake is all gone, and the DIY cake stand needs to be washed, you’ll have to separate them again. Don’t pull them apart forcibly. Take a plastic scraper (the kind you’d use to scrape bread dough), insert it between the plate and bowl, and carefully pry them apart. If traces of adhesive remain stuck on the bowl or plate, or both, do not scrub with anything abrasive to prevent scratching your dinnerware. Soak in warm soapy water to soften and loosen the adhesive then simply pull it off before washing the plate and / or bowl.
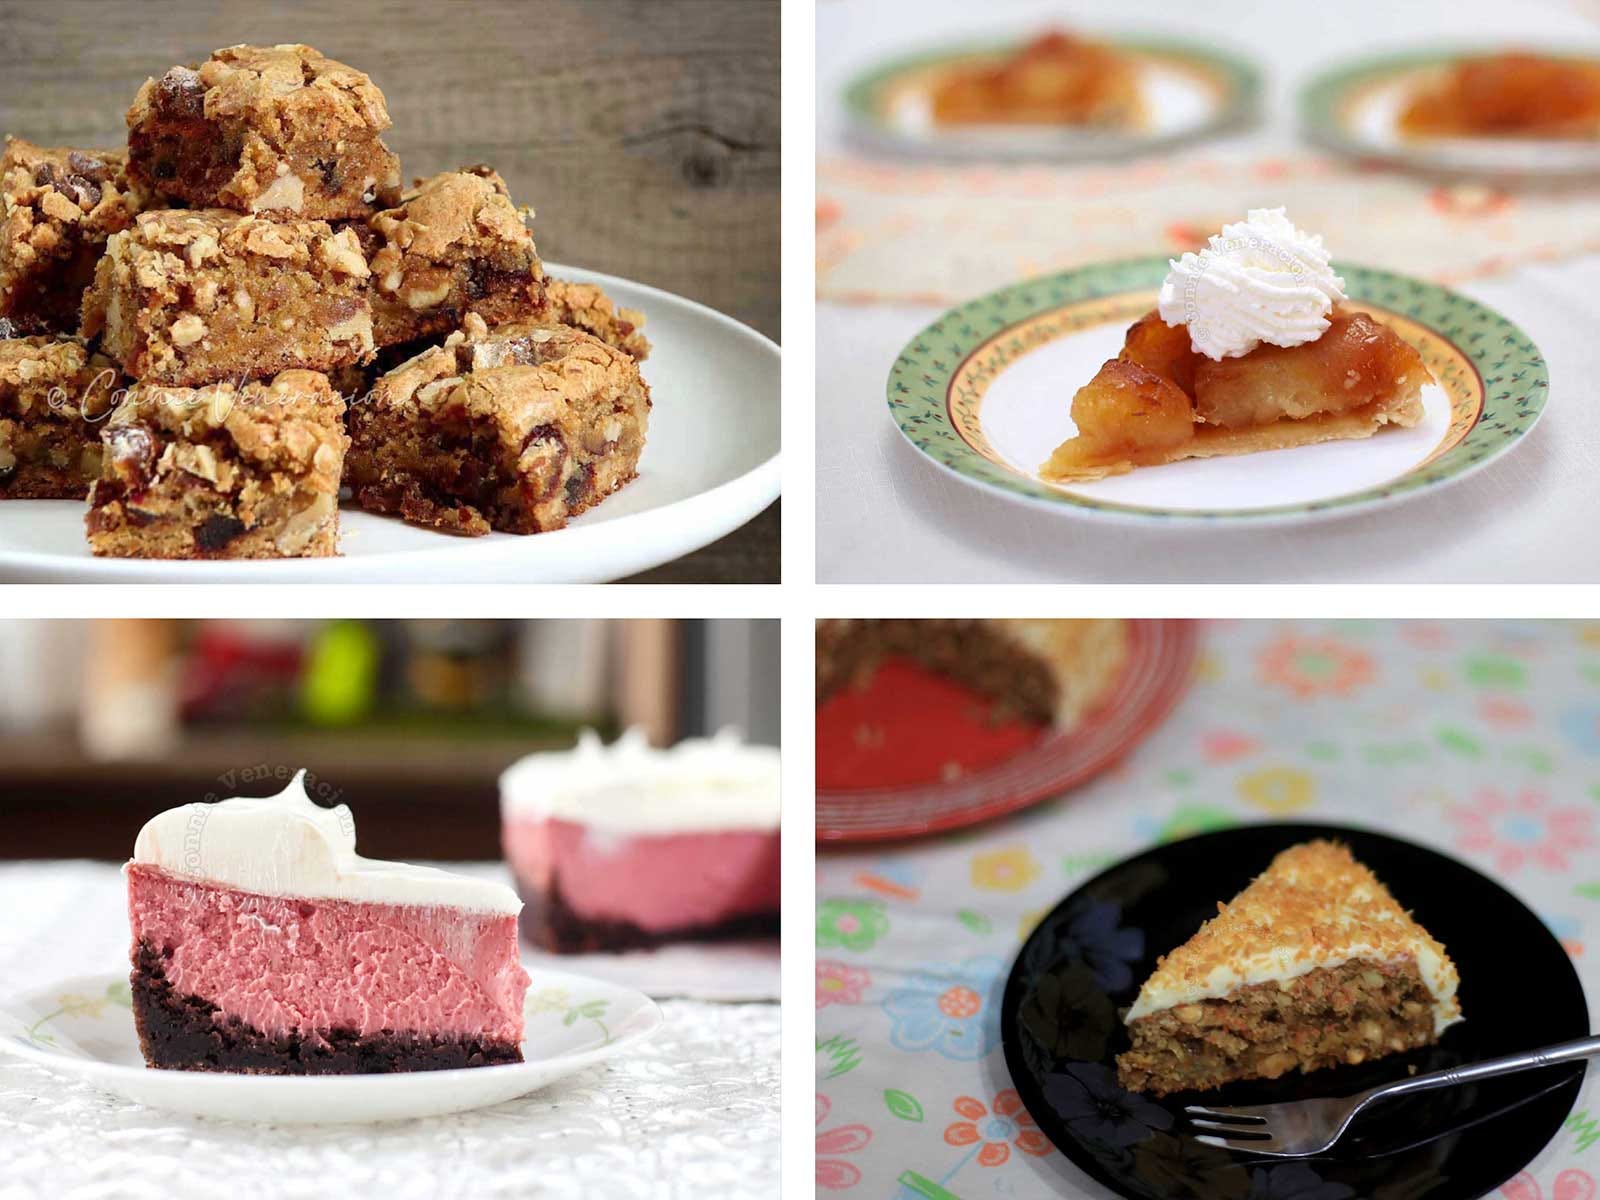
What to serve on your DIY cake plate
They’re not just for cakes. You can serve pies and tarts on them too.